How to Code a Robot: Hardware, Firmware and ROS 2 Steps

Victor
Posted on 25 October 2026
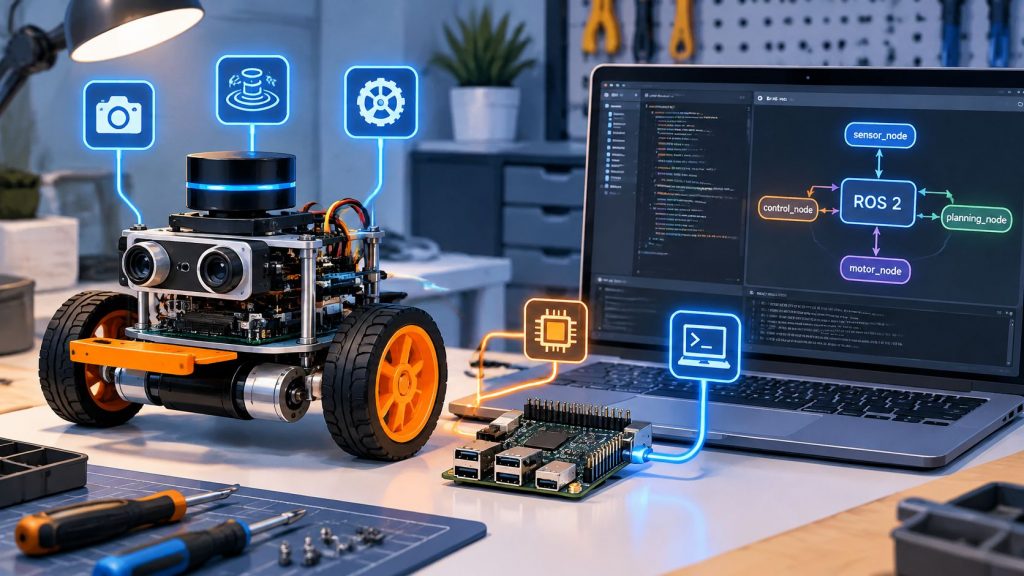



A chassis rests on the bench. Two motors spin when you touch wires to a battery, and the example code on your laptop does not quite fit. A robot moves reliably only when its software parts work together, so build and test each layer before depending on the next.
Plan it as a distributed system from the first line of code. At the bottom, real-time control runs on a microcontroller, reading sensors and controlling motion within safe speed bounds, with a stop path ready before navigation logic. In the middle, planning and perception use sensor information to choose movement. At the top, application behavior decides what the robot should do. Safety limits constrain the bottom layer; they are not a separate layer. This structure helps isolate faults: a motor-control problem can be found on the bench rather than hidden in navigation code. Skip the order, and faults across layers become harder to separate.
Table of Contents
Work through these stages in order. Each one ends with something you can test.

The order matters because each stage produces a testable output. Treating your build like a staged software project workflow with clear checkpoints keeps faults small and locatable.
Your code will divide into three layers throughout. Drivers and real-time control sit at the bottom. Planning and perception sit in the middle. Application behavior, such as navigation or inspection, sits at the top.
One principle decides most of your hardware choices. Put tight timing on a microcontroller and heavy computing on a Linux computer. Motor control needs consistent, fast responses. Camera processing, mapping, and logging need memory and processing power. Asking one board to do both well is where beginners lose weeks.
Start with the electrical facts, not the brand names.
| Platform | Runs | Best for | Main limit |
|---|---|---|---|
| 8-bit Arduino-class microcontroller | Single program, no operating system | Motor PWM, encoder counting, simple sensors | Little memory; cannot run ROS 2 nodes directly |
| ESP32-class board | 32-bit microcontroller with Wi-Fi and Bluetooth | Wireless telemetry and small mobile robots | Less mature tooling for complex control stacks |
| Raspberry Pi-class single-board computer | Linux | Running ROS 2 nodes, camera processing, logging | Not a hard real-time controller; motor timing belongs on a microcontroller |
| Jetson-class AI module | Linux with GPU | On-robot neural-network perception | Higher power draw and cost; overkill for line followers |
| Pre-built ROS-compatible mobile base | Vendor firmware and drivers | Skipping chassis and drive design | Limited access to drive internals and wiring |
A pre-built base saves months of mechanical work. You skip chassis design, motor mounting, and much of the wiring, and you start writing behavior code sooner. The cost is control. If the vendor's firmware doesn't expose the setting you need, you may not be able to change how the drive electronics behave.
A bare board teaches you more. You'll understand every wire and every line of firmware, and that knowledge transfers to your next robot. The cost is your time, because mechanical alignment, power distribution, and driver selection all become your problems.
Practical rule: the motor driver is a separate purchase that your microcontroller can't replace. Check its rated current against your motor's stall current before you order anything.
For a first robot, keep it simple. Use a two-wheel base, one microcontroller for motors and encoders, and one Linux computer for ROS 2. That combination is enough to learn every layer without fighting exotic hardware. Add a Jetson-class module only when you have a perception task that genuinely needs a GPU. Add more sensors only when a test shows you need them.
Plenty of beginners buy for the robot they imagine building next year. Buy for the robot on your bench instead. You'll finish sooner, and the lessons will be clearer.
Setup feels like overhead until a version mismatch eats your weekend. Do it once, carefully, and write down what you installed.
Mixing operating system and ROS 2 versions produces errors that look exactly like code bugs. Packages fail to build, messages don't match, and nodes refuse to talk to each other.
That's why step two comes before step three. Pick the supported pairing, install it cleanly, and resist upgrading mid-project unless you have a specific reason.
There's a tradeoff between Raspberry Pi OS and Ubuntu for ROS 2 work. Raspberry Pi OS is comfortable on Pi hardware, but Ubuntu matches the officially supported ROS 2 path more directly, which means installation guides and package availability line up with the documentation. For a first ROS 2 robot, following the documented path usually saves more time than it costs.
Your Windows laptop still has a role. It's typically a workstation for writing firmware, viewing visualizations, and editing code, rather than the robot's onboard computer. Keep the robot's computer dedicated to running the robot.
Start with the fact that surprises many newcomers. A microcontroller pin can't drive a motor directly. The pin produces a signal, not the current a motor needs. A motor driver sits between them, switching motor current on and off under the microcontroller's control.
The Arduino PWMMotorControl library documentation describes controlling brushed DC motors with pulse-width modulation, or PWM, and optionally using encoders to drive fixed distances. PWM regulates effective motor power by varying the duty cycle of an electrical signal, so your code commands different speeds without continuously changing the supply voltage. Encoders add feedback about wheel or shaft movement, letting your program compare the requested distance with the distance traveled and correct errors.

For a basic two-wheel robot, this supports separate left and right motor commands. That's what lets the robot steer by running one wheel faster than the other.
Floating grounds cause erratic behavior that's hard to reproduce. If your microcontroller and driver don't share a ground reference, signals become meaningless. Check this first when behavior seems random.
Motor noise can corrupt sensor readings. Brushed motors generate electrical noise, and sensitive sensors sharing the same supply or wiring path may report garbage. Separate supplies and tidy wiring help more than clever filtering code written to compensate for bad wiring.
Missing flyback protection risks damaging your electronics when motor current switches off. Many driver boards include this protection, but confirm yours does instead of assuming.
Firmware guarantees bounded, stoppable motion. The host decides where to go.
Keep that division clean. Your firmware should refuse unreasonable commands, enforce its speed cap, and stop when left alone, no matter what the Linux computer asks for. Route selection, obstacle decisions, and task logic belong upstairs. When something goes wrong at the top, the bottom layer still protects the hardware and anyone standing nearby.
Beginners often want to move intelligence into firmware because it feels closer to the machine. Resist that. Firmware that's small, predictable, and boring is firmware you can trust. Every clever behavior you add down there is harder to debug, because your tools on a microcontroller are limited compared with a Linux computer.
Test each numbered step before moving to the next. A wheel that turns at a low duty cycle tells you the wiring works. Encoder counts that rise and fall correctly tell you feedback works. A watchdog that stops the motors when you unplug the cable tells you your safety net works. Those three confirmations carry you into ROS 2 with a base you can rely on.
A node is a small program with one job, such as reading a lidar, computing a velocity, or driving a motor. Your robot's software is a graph of these nodes passing messages to each other.
Follow the sensor-to-motor chain. A sensor node publishes distance measurements on a topic. A controller node subscribes, works out what to do, and publishes velocity commands. A motor node subscribes to those commands and sends them to your firmware.

ROS 2 offers three communication patterns, and choosing the wrong one creates subtle problems. The ROS 2 documentation on topics, services, and actions explains that topics use a publish and subscribe model for continuous data such as camera readings, lidar scans, or robot status. Topics suit streams because the publisher doesn't wait for anyone.
Services use synchronous request and response communication for short operations that need an immediate result, such as a calibration request or resetting odometry. The caller waits for the reply. That's fine for something quick, but a service that runs for several seconds freezes the calling node and makes cancellation awkward.
Actions suit long tasks, such as driving to a target pose. They can provide progress feedback, accept cancellation, and return a final result. The cost is more code, because you must handle cancelled and failed goals properly.
For language choice, Python with rclpy is faster to prototype in, while C++ with rclcpp fits where latency matters. Many robots use both.
Two disciplines prevent most integration pain. Message types and topic names must match exactly across nodes, and interface definitions belong in version control alongside the code that uses them.
Before you write a node, list every topic, service, and action it will use. Mark each one as continuous data, short call, or long task. That small exercise forces the right pattern choice while it's still cheap to change.
Treat testing as a ladder with gates. Don't climb to the next rung until the current one passes.
Run navigation and control code in simulation with a fake sensor feed first. Then run the firmware on a bench with the wheels off the ground. Then drive on the floor at low speed with a person holding the stop. Test the stop path and the speed cap before any normal-speed run. Your firmware section set those limits. Here you verify they trigger as intended.

You can inject test commands with the ROS 2 topic publishing command before the full sensor stack is connected, and record runs with a bag file so you can replay a failure later instead of trying to recreate it. A structured approach to software QA management for staged testing helps you keep those gates consistent across sessions.
For a speed reference, OSHA guidance on robot programming and teaching cites an ANSI recommendation of no more than 10 inches per second, or 250 millimeters per second. That guidance is written for industrial robots. For a small mobile robot, treat it as a conservative starting point rather than a legal threshold, and confirm any obligations with a qualified safety professional.
| Symptom | Likely cause | First fix |
|---|---|---|
| Motor hums but does not turn | Duty cycle too low for the load, or driver not powered | Raise minimum PWM slightly and confirm the driver supply voltage |
| Wheel turns the wrong way | Motor leads reversed or sign inverted in firmware | Correct the sign in firmware so wiring stays consistent with the code |
| Robot drifts in a straight line | Left and right wheel diameters or encoder calibration differ | Measure distance travelled and calibrate counts per revolution for each wheel |
| Host nodes cannot see each other | Different ROS domain setting, mismatched topic names or message types | Check the topic list on both machines and confirm the same domain and message definitions |
| Robot jerks or oscillates | Gains too high or noisy encoder readings | Lower the proportional gain and filter the encoder signal before tuning again |
| Robot keeps moving after a stop request | Stop message not handled, or watchdog timeout disabled | Test the stop path with the wheels off the ground before any floor test |
Finish every session setup with a pre-run checklist. Confirm the stop works, the speed cap is set, the area is clear, and the battery is charged. It takes a minute, and it catches the mistakes that happen when you're eager to see the robot move.
A robot project splits into specialist work faster than many engineers expect. There's embedded firmware, robotics middleware, perception, controls, DevOps for simulation and logging, and QA for hardware-in-the-loop testing. One talented generalist can cover several of these on a small robot. A product usually can't rely on that.
Building in-house makes sense when learning is the goal, when you're building a single small robot, or when your team already writes firmware and ROS code. In those cases, outside help may cost more in coordination than it saves in effort.
AI-generated code can speed up a prototype, and it's truly useful for boilerplate and examples. It doesn't replace controls and safety expertise. Generated code still needs someone who can judge whether a velocity loop is stable and whether a stop path works.
When you do look outside, structured embedded systems engineer interview questions help you separate engineers who have shipped hardware from those who have only simulated it.
| Question to ask | Strong answer | Red flag |
|---|---|---|
| Which robotics stack have you shipped on? | Named platforms, middleware version, and at least one deployed robot | General claims of robotics experience with no stack named |
| How do you test on hardware? | Describes bench, stop-path, and floor test steps before normal speed | Testing described only in simulation |
| Who owns the safety limits? | Names who sets speed caps and stop logic and how changes are reviewed | Safety limits left to whoever happens to write the code |
| How are code and access handed over? | Repository ownership, documentation, and credential transfer defined in writing | Code and accounts kept in the vendor's name |
Your concrete next step is simple. Write your one-page robot specification, list the stages you can't staff, and decide which gap to fill first.
Coding a robot is a build order, not a single program. Define the job and its limits first. Choose hardware that keeps timing-critical motor control on a microcontroller and heavy computing on a Linux computer. Set up your tools with matching versions so environment errors don't masquerade as code bugs.
Write firmware that bounds and stops motion on its own, connect the layers through ROS 2 nodes with clearly defined messages, and test the stop path before any normal-speed run. The speed and stop figures in this guide are starting points for small robots. Industrial safety rules may apply to larger or shared-space machines, so confirm your obligations with a qualified safety professional.
Now write that one-page specification and list the stages you can't staff in-house. Decide which gap to fill first, whether that's firmware, ROS 2 integration, or hardware testing, and then build in the order described above.
If your specification shows a gap in embedded firmware, ROS 2, or hardware testing, talk to HireDevelopers.com about pre-vetted engineers with robotics and DevOps experience. Bring your one-page specification to the consultation, name the stage you can't staff, and ask how candidates test on real hardware before you commit.

You're probably looking at a real hiring mess right now. The app needs to move, the current team is stretched, and every candidate sounds solid until you ask who's owned a release, handled App Review, or shipped something that survived real users. That's the right place to slow down and define what you're buying. When...

Look, you’ve got a killer app idea. But to hire an iOS developer who can actually build it, you have to do more than just toss a job post into the digital void and pray. The secret isn't on some dusty job board. It’s about skipping that mess entirely, defining your project like you mean...

Let's be real. That beautiful project plan you spent a week building is already a work of fiction. Your team is drowning in 'urgent' requests, deadlines are a distant memory, and a few key features have vanished into the ether. Sound familiar? This isn't just you; it's the default state for most growing companies. Before...


